
This is the follower. Not all of the ridges have been taken down--in fact I think it might be a fun exercise to see if I can press designs--so there is certainly a higher level of finish someone can do here. However all the really egregious protrusions have been removed.
The top was also sawed off. It is only pictured here so it is obvious that it was cut. You don't have to do this step necessarily, but with a ten gallon batch of the particular milk I used, it would have hit the edges of the handles and not gone any farther. If I was using raw milk, the batch would have been tall enough for that not to be a problem.
This is the big cheese mold, with 1/8" holes drilled in the sides. The holes on the bottom and lower side are a tad bigger since more whey gets expelled from them.
The mold inside the reinforcer. When you drill the holes keep both buckets together so the holes are placed at the same area. The reinforcer doesn't have any holes in the bottom drilled, just one 1" hole on the side near the bottom so whey can escape. Did I mention you should do your pressing in a sink or bath tub? Yeah, you should, especially if you like your carpet.
And here is what it looks like put together!
A few lessons learned.
First, I am going to drill a few very small holes in the follower, and also install some handles. There was quite a bit of suction this morning when I tried to remove it.
Second, I pressed with 80lbs, and that just isn't enough. Next round it will be doubled.
Third, the bottom of the mold did bow a little bit. Before I ratchet up the weight, I'm gonna think about some simple methods for reinforcing the bottom. It might be as easy as a small metal can sitting in the reinforcer and below the mold, but I don't know yet.
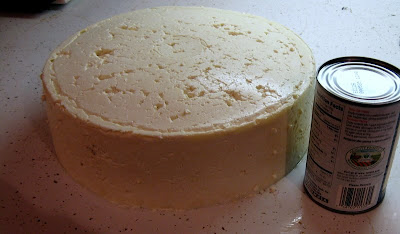
It isn't a pretty loaf of cheese, but I am sure once I get the technique down for handling these friggin' huge batches they will look better.


That is friggin' huge piece of cheese.
ReplyDeleteYes, it is quite huge :D
ReplyDeleteI'm currently looking for wide mouthed, thick walled food grade buckets or containers smaller than five gallon as I can see how small I can make a press like this. With larger, thicker walled ones from brew stores I know I can go much bigger, but it turns out that 12 gallons of milk is the hard limit with the kettle I own.
This seems like a great idea. I bought some 3.5 gallon food grade buckets from my local brew supply store and they did the drilling for free. I'm dying to give this a try. Thanks for the post.
ReplyDeleteIt's the most stable press I've used. Sanitation needs to be rigorous and you need a large kettle, but it rocks.
ReplyDelete